Learning how to thread a needle is one of the first skills every beginner needs to master. Whether you’re learning to sew yourself or teaching children, these three simple methods will make threading a needle much easier.
When I’m teaching kids to sew, I always encourage them to have a go at threading their own needles before offering to help. Kids are surprisingly good at it, and they get a real buzz when they manage it for themselves!
Here are three ways to thread a needle that I’ve used in my sewing workshops.
1. Threading a Needle by Hand
I always start by showing kids how to thread a needle without a needle threader.
A few simple tricks can make all the difference:
- Cut the end of your thread cleanly with sharp scissors. A frayed end makes threading much harder.
- Hold just a tiny bit of thread between your thumb and forefinger. If too much thread is sticking out, it bends when you try to push it through the needle.
- Bring the eye of the needle towards the thread rather than trying to push a long piece of thread through the eye.
Some people prefer pushing the thread through the eye of the needle, while others find it easier to move the needle towards the thread. Try both and see which works best.
My favourite needles for teaching kids to sew are chenille needles. They have fairly large eyes, making them easier to thread, and they’re sharp enough to sew through felt.
2. Using a Needle Threader
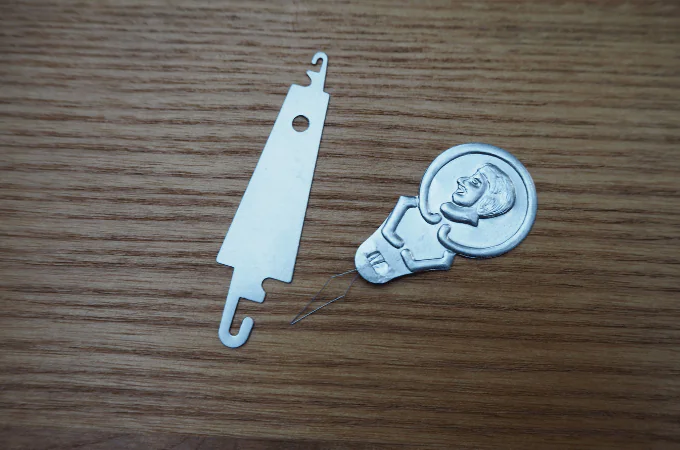
If threading a needle by hand is proving too tricky, a needle threader can be a great help.
The traditional wire needle threader is probably the one most people recognise. I remember using these as a child!
Here’s how to use one:
- Push the little wire loop through the eye of your needle.
- Pass your thread through the wire loop.
- Gently pull the wire loop back through the needle’s eye, bringing the thread with it.
The old-fashioned wire threaders work well, although the wire can break rather easily.
For something a little sturdier, I like the LoRan needle threader.
3. The Folded Paper Needle Threader
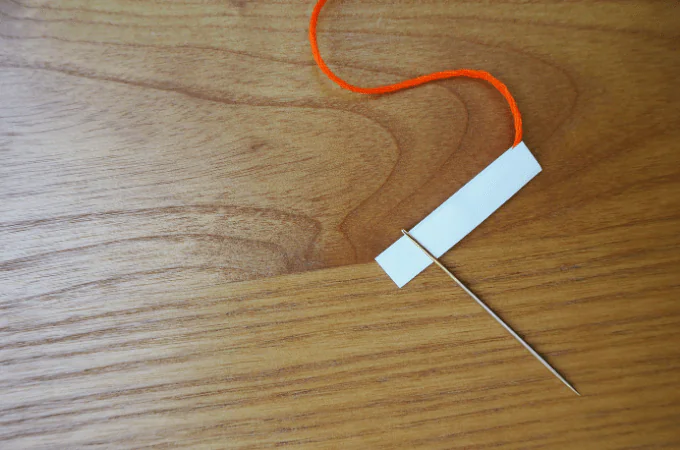
Now, this is my favourite little trick when I’m teaching a group of kids and suddenly everyone needs help threading their needles!
All you need is a tiny piece of paper.
- Cut a piece of thin paper approximately an inch long and half an inch wide.
- Fold it lengthways in half.
- Place the end of your thread inside the fold.
- Carefully push the folded paper, with the thread tucked inside, through the eye of your needle.
- Pull the paper through until the thread comes with it.
You’ll need paper that’s thin enough to fit through the needle’s eye. This works particularly well with larger-eyed needles.
It’s such a simple trick, and very handy when you don’t have a needle threader nearby.
Helping Kids Learn to Thread Their Own Needles
Kids love a challenge, and threading their own needle is a wonderful little achievement.
It takes concentration and fine motor skills, and I love watching their faces when they finally succeed.
I sometimes make the occasion quite official and award them a Certificate of Sewing Achievement, designed by Yiscah’s Pencil Box.
Of course, when I’m running workshops, things can get a little frantic towards the end. Everyone is trying to finish their softies, and suddenly there are lots of needles that need threading!
That’s when I bring out my just-in-case supply of pre-threaded needles. It makes those last 15 minutes run much more smoothly.
Once your kids have mastered threading their needles, they’re ready to start stitching. You can read about the essential hand sewing stitches I teach kids.
This post may contain affiliate links.