The other day I asked teachers in my Sew a Softie Facebook Group, “What questions did you have when you started teaching sewing in your classes?”
Arlene Shelton came back with a great question: How do other teachers organise needles and thread in a class for easy distribution to students? I put the question to the group and got some great answers.
(Some links in this post are affiliate links which means I might earn a small commisison if you click on the link)
Here are their tips for organising needles and threads in the classroom:
Trixi Symonds

That little zenki above is Square Cat. She’s a great believer in pre-threaded needles, and so am I.
She just reminded me that in my sewing workshops, I like to start kids off with a pre-threaded needle. Especially when I don’t yet know the kids. Pre-threading allows your students to get right into the actual sewing and can be particularly helpful in a classroom where kids have a limited time to complete their project.
And I always have a supply of pre-threaded needles on hand just in case there are a few kids at the end of the lesson who need that ready-to-go already threaded needle to finish their softie companion on time.
Lisa Zappia
I prepare small, clear plastic, numbered containers for my students. Inside each container is a magnet that holds their needle and six sewing pins. Each student has to use the same numbered box for each lesson. To keep track of everything, I have a folder with the class list and the numbered container assigned to each student.
On a large sheet of paper, I have drawn an outline of the base of each box with its number. At the end of each lesson, students place their container on its numbered outline so I can see if any are missing. I get them to put their needle on top of the magnet on the left and the six pins on the right. This makes it super easy to scan for any needles or pins have gone astray. And my kids don’t leave the room until any missing needle or pin is found!
For thread, I have two large tubs at the front of the room with small plastic containers with pre-cut thread: one tub has containers of warm coloured thread, the other has containers of cool coloured thread, and a smaller tub holds containers of black, white and brown thread. This makes it easy for my students to select the thread they want and to return it at the end of each lesson.
I’ve used this system with twelve classes ranging from Year 2 to Year 6 and it works beautifully!
Katie Cooper Ford
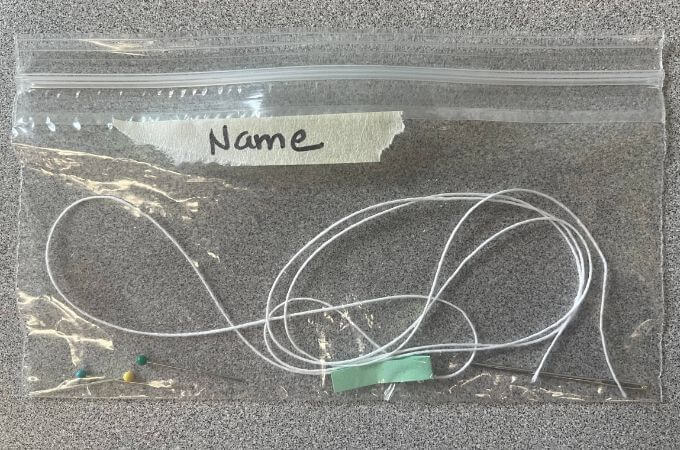
I prepare snack-sized ziplock bags. Each ziplock bag contains a needle, three sewing pins, a paper needle threader and some thread. I use perle cotton, which is a bit thicker than ordinary sewing thread, and I like to start everyone off with white thread so they can see their stitches clearly.
Bonnie Gardner
I prepare small felt swatches with five pins and a needle on each swatch. I prep embroidery floss by wrapping it around a small piece of cardboard that has a slit on each side to hold the ends of the thread. Each student receives a gallon-sized ziplock which they write their name on and store everything in until they complete their project.
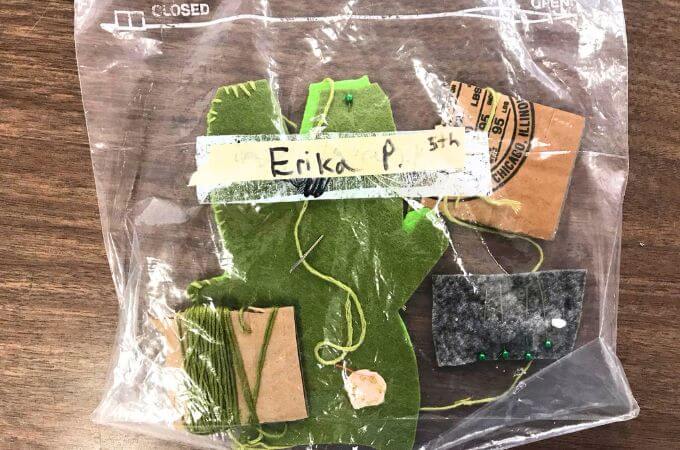
When they’ve completed a project, they return their pins and needle, their empty ziplock bag, and any unused floss or felt scraps.
Bonnie also has really useful way of getting students to estimate a good length of thread to use:
I show them how to use the short end of their table to measure the length of thread needed and I get them to double the thread and tie its ends in a knot. This stops their thread slipping off the needle.
Lisa Layton
Lisa combines a first sewing project with the need to organise student supplies.
I like to get my students to make a needle case to keep their needle and pins in. And it’s their first sewing project too!

If you’d like to use Lisa’s suggestion, then here’s an easy to sew needle book you might like to make with your students
Rena Taylor
Rena, has a wonderfully creative way of keeping track of those pesky needles that go missing-in-action:
I make a Needle Parking Sheet for each class:

I write each students name per homeroom on the sheet of paper. Then I laminate the sheet, put on masking tape for dates and checks beside each name to mark when they take a needle for the class. I use blue painters tape turned up on one side “to park” the needles in. I can quickly look to see whose needle is missing at the end of class. I also give my students about an arms length of thread when they get their needle, as well as a needle threader and felt
I call up the kids by their table color if they need assistance or more thread. This system has worked really well for me. This is the only lesson where I can actually sit down and let students come to me. At all other times I am walking around the room assisting and giving feedback.
Katheryn Alonso-Bergevin
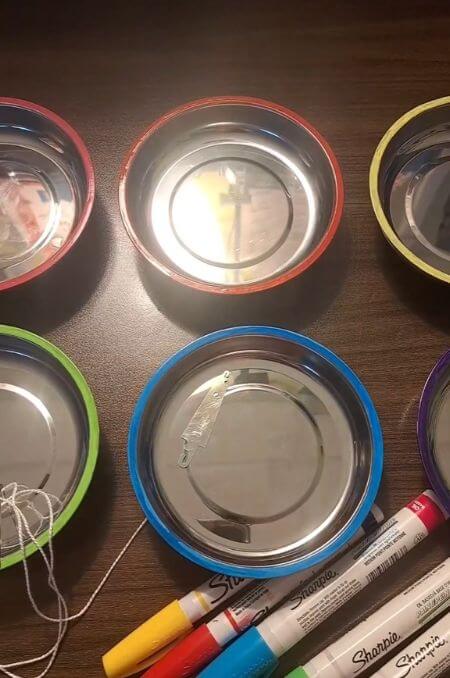
To hold and distribute my students’ needle and needle threader, I got some magnetic dishes from a hardware storage and colored the rims with the students’ table colors.
Do you have any other nifty ways of organising your sewing supplies in classes or workshops?
If you do and you’d like to share, then please let me know in the comments. There are a lot of teachers out there who’d love to hear from you!