September 15…or thereabouts…is International Dot Day…and that’s a day for teachers and kids and parents to remember.
All around the world people are celebrating the potential that resides in a tiny beginning…like a dot. And we are all celebrating in our own unique ways.
My way is to design a dot day sewing project. A dot zenki! He’s a wonky-looking dot for sure but he’s a dot. And he’s bursting at the seams with energy and life!
If you’re a teacher or a parent who wants a Dot Day sewing idea for your kids that is simple, loads of fun and allows plenty of room for each kid’s own creative touch, then Dot Day Zenki should be great for you 🙂
Here is how you make him.
Wait a minute!…I guess I should say something brief about zenkis before I dive into this project: in case you don’t know, zenkis are the simplest friendliest softies in the universe. I designed them to minimize problems and maximise creativity.
And if you’re an art teacher looking to add textile/fabric art to your curriculum, you might have a look at my book The Zenki Way: A Guide to Designing & Enjoying Your Own Creative Softies. It includes a special section on how to run a zenki sewing workshop for kids.
OK, let’s get started.

This is Dot Day Zenki climbing a tree. But he also likes to do other things. This one loves to dance. You’ll soon find out what your one likes to do once you’ve made him or her.
What You Need to Sew your Dot Day Zenki
White felt for eyes
Thread
Pins or Sewing Clips
How to Sew your Dot Day Zenki

Download the templates. Trace and cut out Dot Day Zenki’s face from pink felt, the front of his body from blue felt and the back of his body from aqua felt.

Cut out two eyes from white felt. You can do this freehand or use the templates. For some useful ways to cut out neat circles from felt, have a look at my video on easy ways to cut out circles from felt.
Position the eyes on the face and sew into place with a french knot. This creates the pupils. If you don’t know how to sew a french knot you can learn how easy it is from my video or just glue on eyes and pupils.
Lastly, I’ve used a single stitch of black thread to make the mouth.
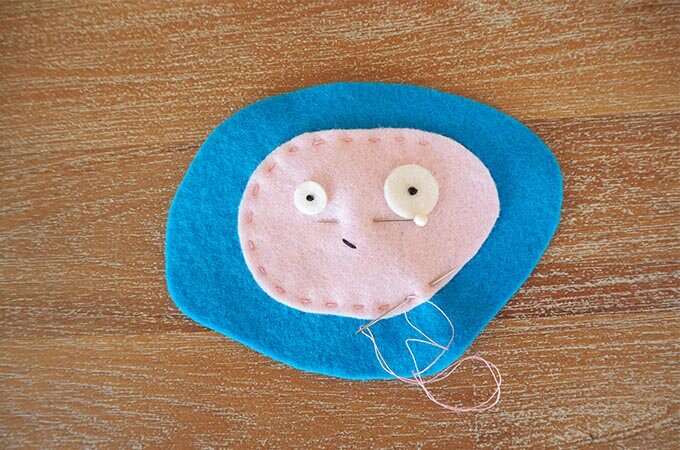
Pin and sew Dot Day Zenki’s face onto the front of his body. Remember to leave an opening for stuffing as shown above.

Stuff and sew the opening closed. At this point Dot Day Zenki will start to look very happy as he is almost complete. Of course, he might be a she.

Pin and sew the front and back of his or her body together.

And that’s it!
Your happy Dot Day Zenki is ready to shout and sing and dance and rave and tell all the world that International Dot Day is here!!! Yay!!!
Have a fun, creative Dot Day wherever you are, Trixi