By teaching her son to sew one mum overcame her fear of giving him sharp sewing needles
Back in March, I asked Rossa @curiouslittlepeople if she wanted to join into Sew a Softie. She wasn’t quite sure…she really didn’t know how to start teaching her boys to sew and the thought of giving boys sharp sewing needles…well that was just asking for trouble, wasn’t it! But never-the-less Rossa decided to throw caution to the wind and to join in and wrote “I guess committing to this is just the thing to force us to give it a go.” And I’m glad she did.
After Sew a Softie in July I asked Rossa if she could write a little about her experience teaching her son to sew.
Rossa: My first taste of sewing was through my Mum who has sewn for as long as I can remember. When I was little Mum had an old Singer machine with a side wheel and I have memories of turning the wheel for Mum while she sewed. As I grew, I had little interest in sewing and whilst I can manage basic hand and machine sewing, I unfortunately didn’t further my sewing skills in the years I lived with my Mum – how I regret this now! When Big boy was born, it sparked a creative desire and all I wanted to do was to create and make all sort of things. In the years since I’ve slowly attempted to further the basic sewing skills Mum taught me as a child.
I hadn’t considered introducing my boys to sewing until I started following the amazing community at Colouredbuttons and even then I was apprehensive when and where to start – the thought of handing over sharp needles to my sons was terrifying!
In my view the basic skills required for hand sewing is the ability to safely handle a sewing needle, scissor skills and good fine motor ability. A patient temperament comes in handy too! You are the best judge of when your child is ready. For Big boy this age was 7 years and at his young age I’m amazed how his hand stitching improves with every project. Little boy has not shown any interest in attempting sewing, for now he’s happy to watch his brother; the main thing is to take cues from your child.
The first project you choose to sew is important because sewing is like a puzzle where the pieces need to come together in the right order to enjoy success! We found it best to start with a simple tutorial and the piranha softie tutorial on Colouredbuttons site we found ideal as it takes you through the steps that sets the essentials for basic sewing.
The idea for making a Guff softie came after reading Aaron Blabey’s picture book Guff . Guff looks just like a child’s drawing made into a softie so it was the perfect project to tackle with Big boy. Big boy enjoyed drawing Guff and even more thrilled to turn his drawing into a softie!
WHAT YOU NEED
Green felt for body
Yellow felt for face
Red felt for heart
2 x buttons for eyes
Fibre filling for stuffing
Needle
Pins Thread
Scissors
WHAT TO DO
Draw an outline of Guff’s body, face and a heart on paper. Cut out these three pieces, they will be the pattern to cut the felt.
Use the paper patterns to cut out 2 body shapes from green felt, 1 face shape from yellow felt and a heart shape from red felt.
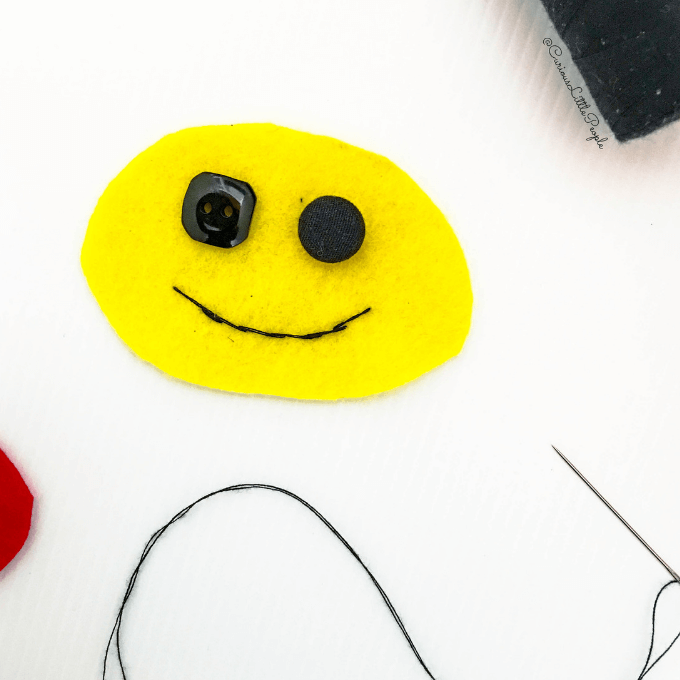
Use back stitch to make Guff’s mouth. Sew on buttons for eyes.
.
Pin Guff’s face and heart onto one of the green body shapes. Use an over stitch to sew into place.
Pin and sew the two body shapes together leaving a gap for stuffing. Fill with stuffing and sew the gap closed.
Have fun making our friendly Guff!
About Rossa


2 thoughts on “One mum’s thoughts on teaching her son to sew”